


An Evidence Based Approach for Success
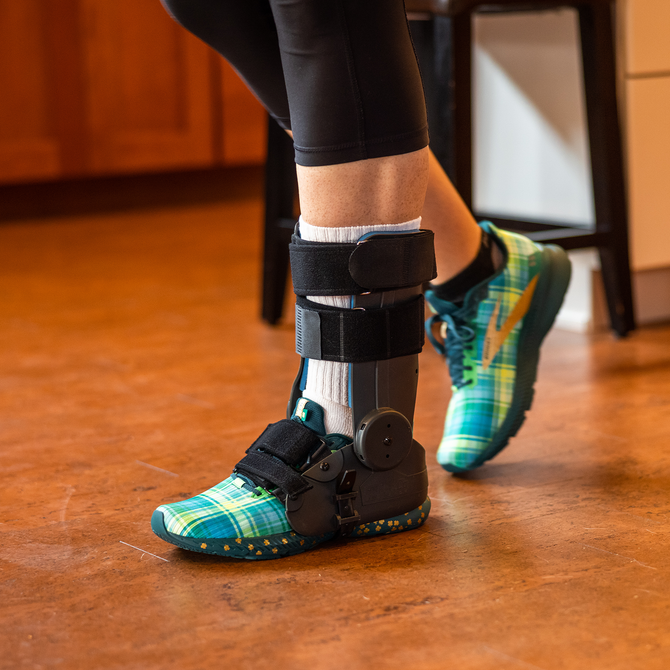
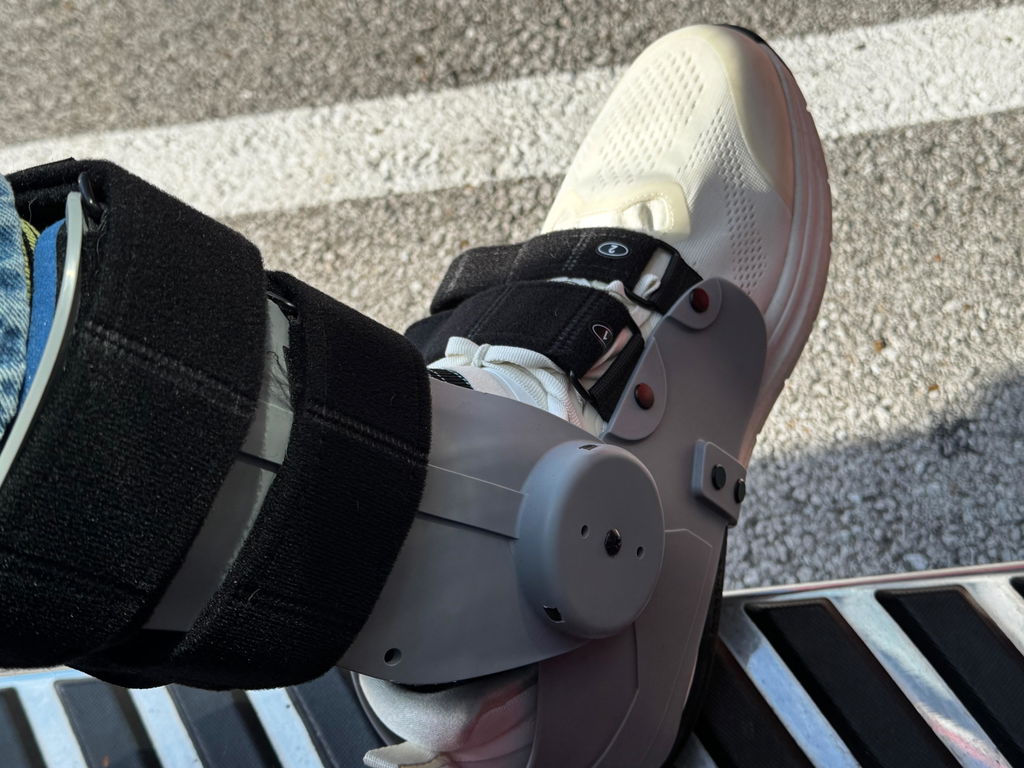
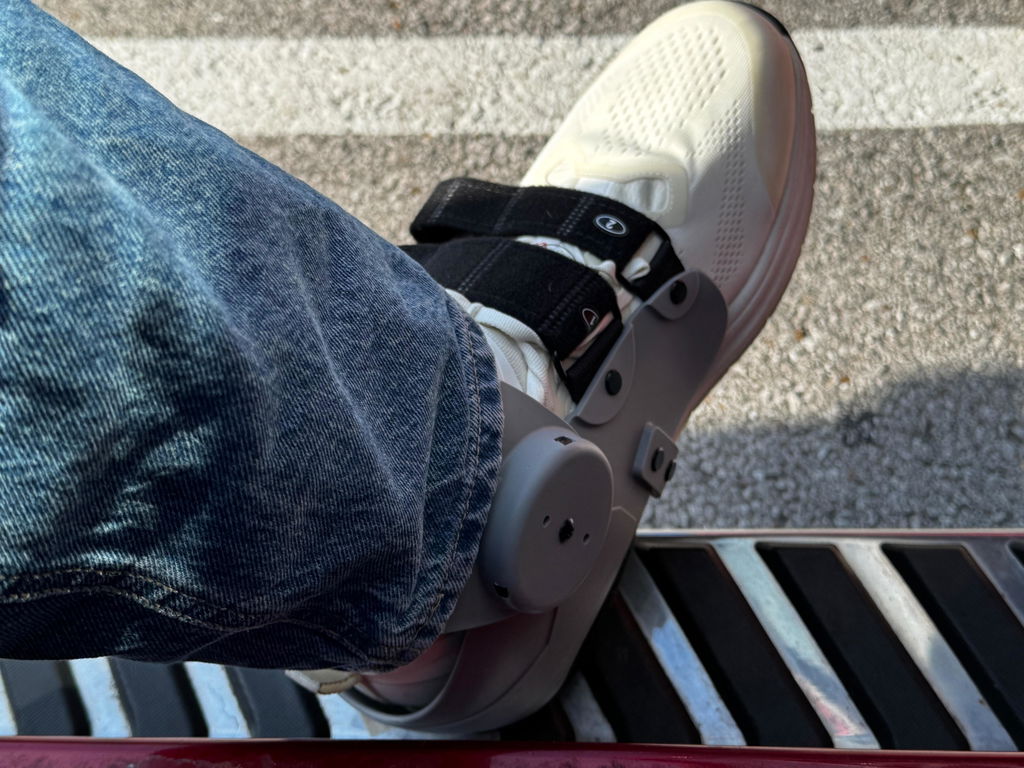
Following a Bridle tendon transfer, maintaining alignment and support through the midfoot and ankle is critical for proper tendon healing and restoration of balanced gait mechanics. After a period of immobilization in a splint and cast for four weeks, I transition patients to a boot and then to the TayCo® Acute XAB Brace for continued support.
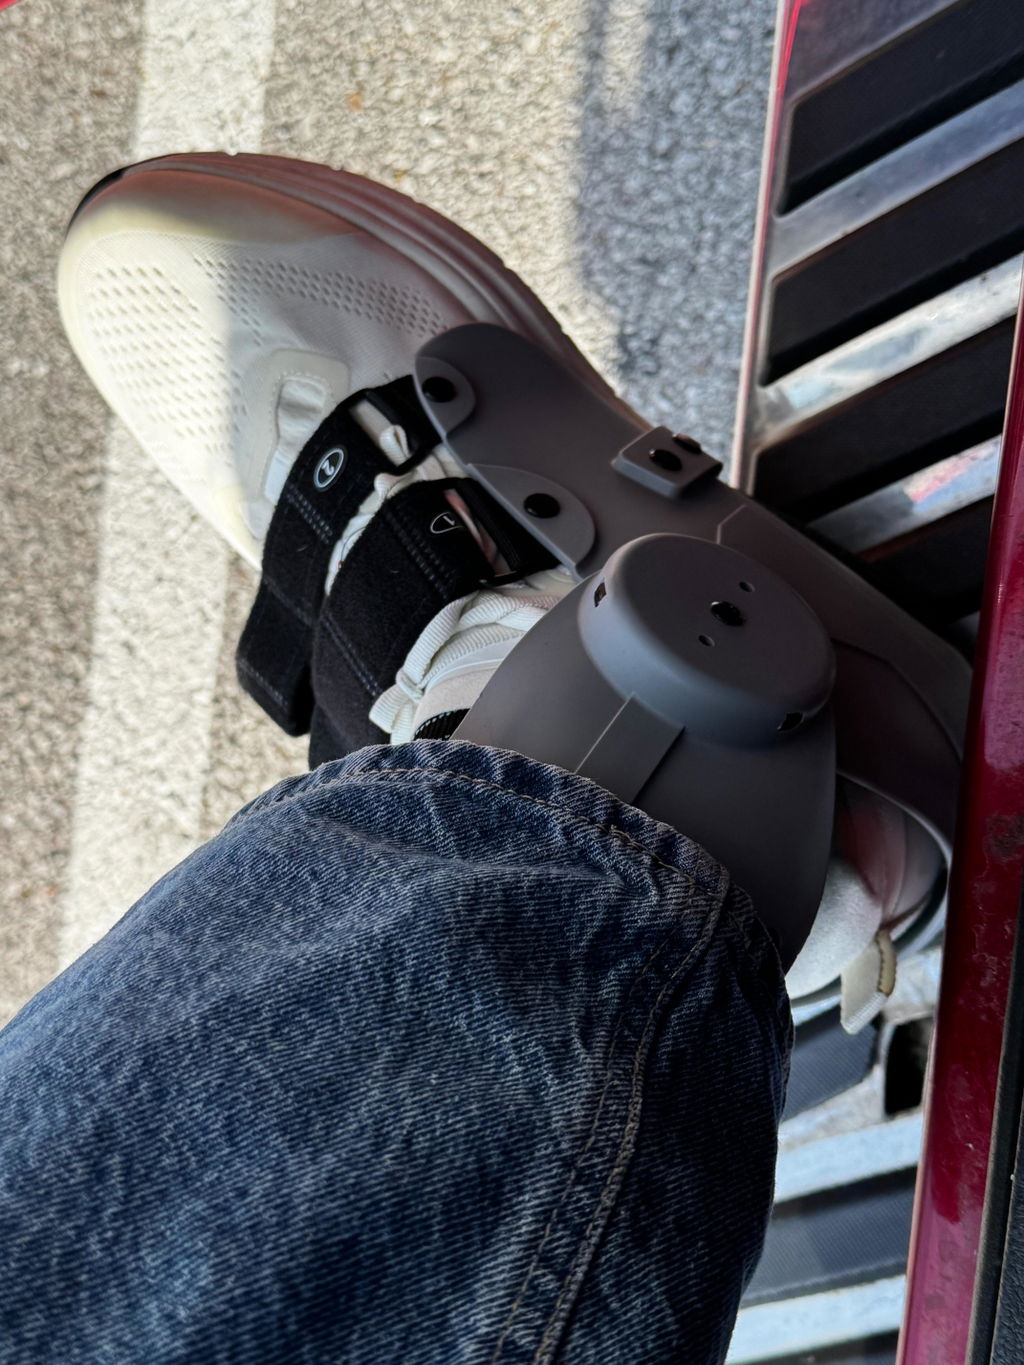
I prefer the Acute XAB Brace because it provides reliable ankle stabilization without the discomfort of a traditional in-shoe brace. Since it attaches externally to the patient’s footwear, it eliminates direct pressure over the surgical site and foot, which patients often find uncomfortable or intolerable with standard ankle-foot orthoses.
The Acute XAB Brace is locked in dorsiflexion, which helps reinforce the transferred tendon’s new line of pull and provides additional dorsiflexion support during early gait retraining. This helps reduce overuse of the healing tendons and encourages proper foot positioning during stance and swing phases.
Patients consistently report that the Acute XAB Brace is comfortable, easy to wear, and provides a noticeable sense of pain relief and functional stability. It enables a smoother progression from immobilization to protected weight-bearing and ultimately back to full activity, with higher compliance and confidence in the recovery process.
By incorporating the Acute XAB into my protocol, I aim to protect the surgical reconstruction while promoting a more natural, supported gait — all without compromising patient comfort.
Postoperative Rehabilitation Protocol: Bridle Tendon Transfer
Informed by Johnson et al., Foot Ankle Int. 2015; 36(11):1287–1296
Overview
The Bridle tendon transfer (tibialis posterior + peroneus longus to the dorsum of the foot) is designed to restore active dorsiflexion and correct foot drop. Postoperative care must protect the transfer while gradually restoring mobility and strength. The following protocol is consistent with principles from established foot and ankle rehab programs and peer-reviewed recommendations.
Phase 1: Immobilization & Protection
Weeks 0–4
- Immobilization: Short leg, non–weight-bearing cast with ankle in neutral
- Weight-Bearing: Strict non-weight-bearing
- Activity: Foot elevation, maintain mobility of hip and knee
- Goals: Protect tendon repair, minimize swelling
- Transition: Cast changed at 10–14 days post-op after suture removal
Phase 2: Transition to Controlled Mobility
Weeks 4–6
- Immobilization: Transition to a CAM walker boot
- Weight-Bearing: Begin touch-down weight-bearing, progress to partial then full weight-bearing as tolerated by end of week 6
-
ROM Guidelines:
- Week 6: Begin active and active-assisted dorsiflexion
- Gentle active plantarflexion may begin
- Avoid passive plantarflexion until at least 12 weeks to protect the tendon repair
-
Therapy Focus: Muscle re-education, proprioception (seated or with brace), gentle isometrics
Johnson et al. emphasize starting active ROM at 6 weeks to retrain the transferred tendon while protecting it from elongation, and delaying passive plantarflexion until 3 months to prevent overstretching.
Phase 3: Functional Strengthening
Weeks 6–12
-
Bracing: Transition out of boot at 6 weeks into:
- TayCo Acute XAB Brace locked in dorsiflexion
- or Drop foot AFO for more robust support
- Weight-Bearing: Full weight-bearing in brace
-
ROM Focus:
- Continue dorsiflexion ROM
- Gradually introduce passive plantarflexion after 12 weeks
-
Therapy Goals:
- Progress dorsiflexor strength
- Normalize gait in brace
- Initiate closed-chain balance drills
- Begin stationary bike or elliptical as tolerated
Phase 4: Advanced Rehab & Weaning
Weeks 12–20
- Brace Use: Continue brace for all activity through 16 weeks, then wean to brace only for outdoor or higher-risk activities
-
Therapy Focus:
- Full active ROM
- Calf strengthening (heel raises, resistance walking)
- Proprioception, single-leg balance
- Functional training, light jogging or sport-specific drills
Phase 5: Return to Activity
20+ weeks
- Brace Use: Discontinue for daily use; may continue for sports or uneven terrain
-
Therapy Focus:
- Full return to desired level of activity
- High-level balance, agility, and plyometric drills if indicated
- Functional testing for return to sport/work
Key Points from the Literature
- All patients in the Johnson et al. study were brace-free for daily activities postoperatively by 3–6 months.
- Initiation of active ROM at 6 weeks showed good outcomes with protection against overstretching.
- Using tendon-to-bone fixation (vs tendon-to-tendon) appears to reduce the risk of failure due to elongation over time.
- No evidence of arch collapse was seen on radiographic follow-up at 2 years.
Important: This protocol is a general guideline. All patients should follow the specific instructions provided by their surgeon. Always consult your physician before beginning or progressing with rehabilitation exercises.


